React application project setup - II
This blog is continuation to my previous blog. In my last blog we have setup the environment. In this blog we will configure the react application using webpack bundler. Now we can start creating the react application from the scratch.
TABLE OF CONTENTS
- Steps to create folder and package.json file
- Webpack installation
- Setup Babel
- Wepack configuration
- Development server configuration
Steps
- Open terminal and go to the path where you are going to create your project.
- Create a folder "my-react-app".
mkdir my-react-app- Go to the folder "my-react-app".
cd my-react-app/- Then initialise the NPM project.
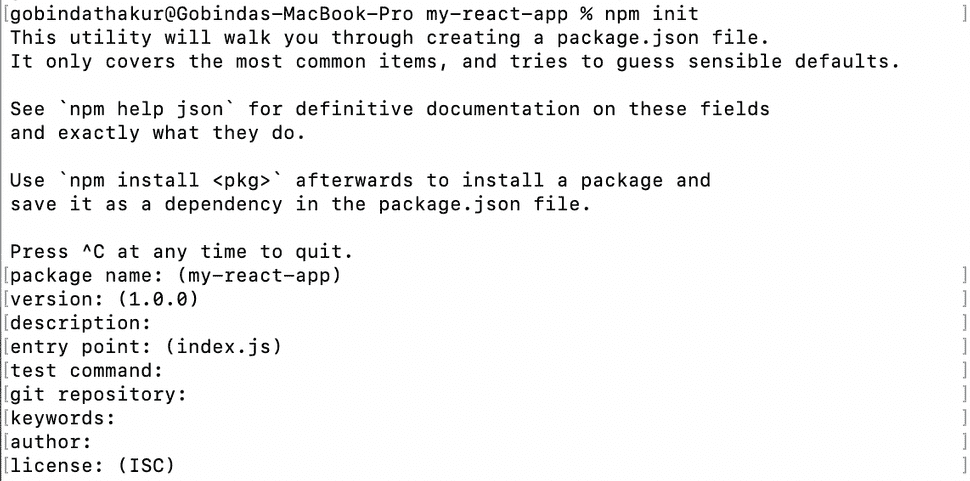
npm initIt will ask for your inputs for package name, version etc.
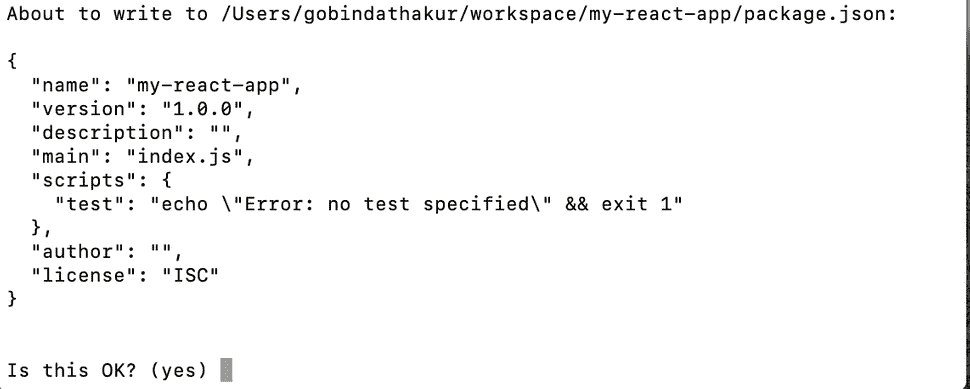
You can provide the detail here or press enter and proceed without giving inputs. It will create package.json file in root folder. You can edit it later.
All npm packages contain a file, usually in the project root, called package.json this file holds various metadata relevant to the project. This file is used to give information to
npmthat allows it to identify the project as well as handle the project's dependencies. It can also contain other metadata such as a project description, the version of the project in a particular distribution, license information, even configuration data - all of which can be vital to bothnpmand to the end users of the package. The package.json file is normally located at the root directory of a Node.js project.(source)
But what is package.json? To know more about this, you can follow this docs.
Install Webpack
Webpack is valuable not only for working with React but for configuring every frontend project. It build the react application and produce JavaScript code that almost every browser can understand.
Let's install it by running
npm install --save-dev webpack webpack-cliAfter installation completed, you can see a folder with name node_modules at the root of your project. NPM use to create this folder and download all dependancies to this folder.
Note*- Downloaded dependancies need not to be pushed to the GitHub.
Setting up Babel
Mostly, we write react in JavaScript ES6. Older browsers cannot understand the new syntax. So for getting ES6 to work in older browser our code has to get transpiled. Webpack doesn't know how to transpile ES6 JavaScript to ES5. Now babel-loader comes into the picture and it makes use of BABEL . Concept of loaders in the webpack is to takes something as the input and produces something else as the output.
Babel needs to be installed with some presets.
- babel preset env for compiling Javascript ES6 code to ES5.
- babel preset react for compiling JSX and other stuff down to Javascript.
Note*- babel-preset-es2015 is now deprecated.
Let's start installing it.
npm install --save-dev @babel/core babel-loader @babel/preset-env @babel/preset-reactTo configure babel we need to create file .babelrc at the root of your project folder.
touch .babelrcAnd add below code.
{
  "presets": ["@babel/preset-env", "@babel/preset-react"]
}
Configure Webpack
We can do a minimal webpack configuration now. First we have to create webpack config file.
Go to your terminal and navigate to your project root folder. Then run
touch webpack.config.jsThe add below code to the newly created file.
module.exports = {
  module: {
    rules: [
      {
        test: /\.(js|jsx)$/,
        exclude: /node_modules/,
        use: {
          loader: "babel-loader"
        }
      }
    ]
  }
};
It means, for every file with a js or jsx extension Webpack pipes the code through babel-loader for transforming ES6 to ES5.
Configure development server
To run the application we are going to use webpack-dev-server. To know more about the dev server you can follow this doc. The best part of this dev server is Hot Module Replacement. It removes the pain of manually refreshing the browser once the changes have been saved.
To install it, run
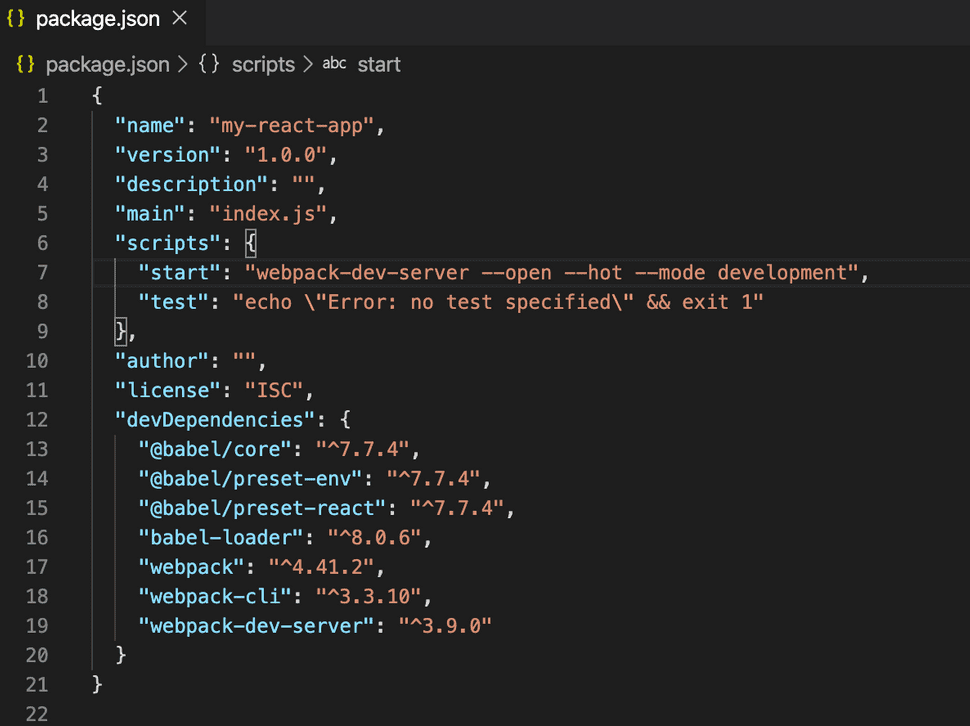
npm install --save-dev webpack-dev-serverNow, we need to add a script to package.json file to start the application.
"start": "webpack-dev-server --open --hot --mode development",Your package.json will be looking like:
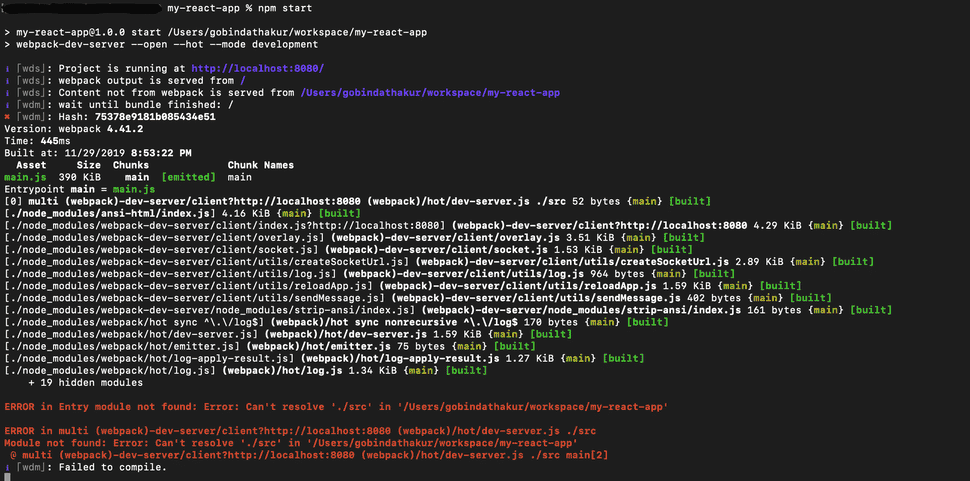
When you execute the below command
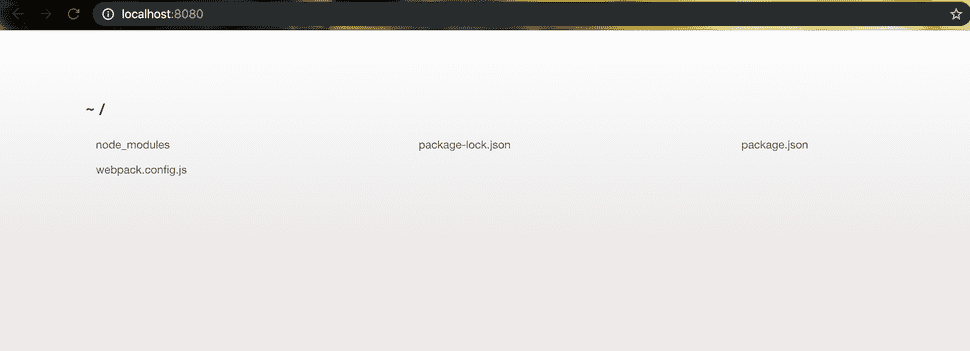
npm startIt will open window in chrome with http://localhost:8080.
Also you will get an error in the command line.
In my next blog we will take care of this error. This much configuration is fine for now.
