React application project setup - III
It is continuation to my previous blog. Link for the previous two blog is:
In my last blog we have done a basic configuration with webpack and babel. We ended up with an error in the command line. Let understand this error before proceeding.
Error text:
ERROR in Entry module not found: Error: Can't resolve './src' in '/<user>/workspace/my-react-app'


ERROR in multi (webpack)-dev-server/client?http://localhost:8080 (webpack)/hot/dev-server.js ./src
Module not found: Error: Can't resolve './src' in '/Users/gobindathakur/workspace/my-react-app'
@ multi (webpack)-dev-server/client?http://localhost:8080 (webpack)/hot/dev-server.js ./src main[2]
ℹ 「wdm」: Failed to compile.
It is not able to find the entry point in our application. Usually we configure it in the webpack.config.js file. If we don't specify the entry then by default it will search for ./src/index.js path.
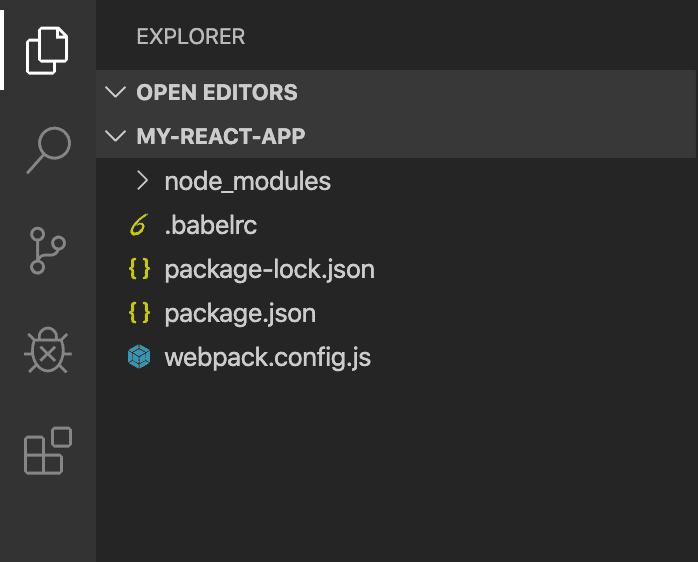
Currently the folder structure of our application looks like:
To resolve this error, we need to add the entry file. Our entry file will have react code inside it. Let start with installing the react and react-dom packages.
npm install --save react react-domThen create a folder src at the root of the project.
mkdir srcCreate index.html and index.js files inside ./src.
touch ./src/index.html ./src/index.jsAdd below code to your index.html file.
<!DOCTYPE html>
<html lang="en">
  <head>
    <meta charset="utf-8" />
    <meta
      name="viewport"
      content="width=device-width, initial-scale=1, shrink-to-fit=no"
    />
    <meta name="theme-color" content="#000000" />
    <title>My react app</title>
  </head>
  <body>
    <noscript>You need to enable JavaScript to run this app.</noscript>
    <div id="root"></div>
    </body>
</html>
You can see <div id="root"></div>. Remember this id with name root. Our react code going to append here.
Let's add the below code to the index.js.
import React from "react";
import ReactDOM from "react-dom";
const HelloWorld = () => {
  return (
    <div>
      <h1>Hello World!</h1> from React App
    </div>
  );
}
ReactDOM.render(
  <HelloWorld />,
  document.getElementById('root')
);
As you can see, we have used root here to append the DOM tree. To learn more about this you can follow this.
Now, if you run the app again npm start then it will compiled without any error but you will not able to see any change in the browser. To run the application successfully we need to add some configuration in the webpack.config.js.
Let's add html-loader and html-webpack-plugin to operates on html file.
npm install --save-dev html-loader html-webpack-pluginReplace the code in webpack.config.js with below code:
const HtmlWebPackPlugin = require('html-webpack-plugin');
const webpack = require('webpack');
module.exports = {
  entry: './src/index.js',
  devtool: 'eval-source-map',
  mode: 'development',
  output: {
    path: __dirname + '/public',
    publicPath: '/',
    filename: 'bundle.js'
  },
  module: {
    rules: [
      {
        test: /\.(js|jsx)$/,
        exclude: /node_modules/,
        use: {
         loader: 'babel-loader'
        }
      },
      {
        test: /\.html$/,
        use: [
          {
            loader: 'html-loader'
          }
        ]
      },
    ]
  },
plugins: [
  new HtmlWebPackPlugin({
    template: "./src/index.html",
    filename: "./index.html"
  })
 ],
};
Let see what we have configured:
entry and output: These are used to provide information to the compiler, such as where to find the source files and where to put the output compiled version. To know more about entry follow this link and for output follow this link.
mode: Mode of the development environment. Here we are setting it to 'development'.
devtool: It use to enhance the debugging process. Click here for more detail.
plugins: Configure what plugins you need in your app. To know more about it follow this link.
Now, when you start the application by npm start, you can see the browser with application running in it.
As application is running fine, let's do our first commit to the GitHub.
Steps:
- Login to your GitHub account.
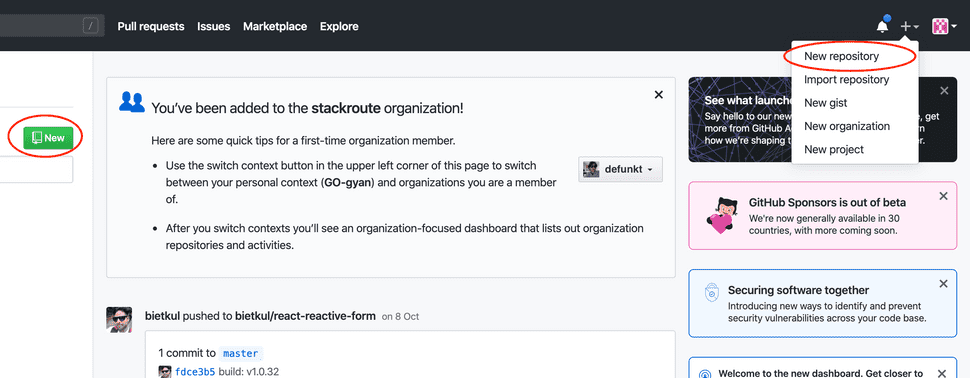
- You can see two options(marked with red ellipse) on the screen to create a new repository.
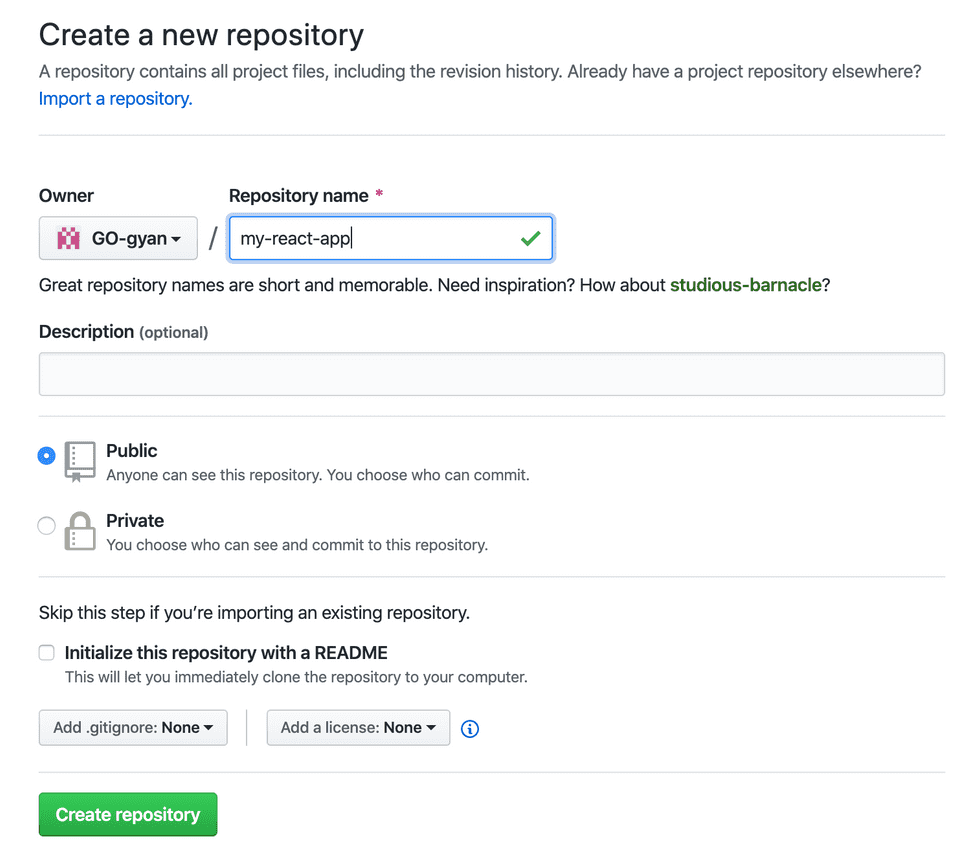
- After clicking on "New" button or "New repository" link, it will open a screen to enter the repository name.
- Provide the repository name "my-react-app" and click on "Create repository".
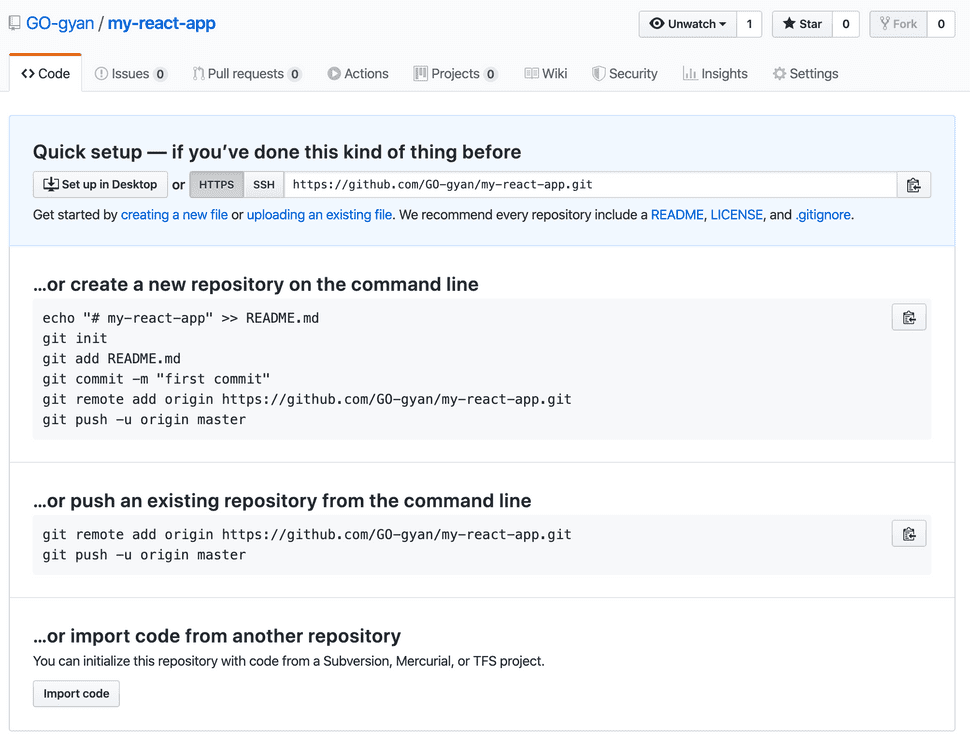
- It creates the repository with name "my-react-app" and show you the steps for commit and push the code.
- We are not going to follow the exactly same steps. Please follow below steps.
- Go to command line. Proceed to the project path and initialize the git.
git init
//output:
Initialized empty Git repository in /<path>/workspace/my-react-app/.git/- Then create the file
.gitignore. It help us to avoid the adding unwanted files.
touch .gitignore- Open the
.gitignorefile in the editor and add below code.
node_modules/No need to push the
node_modulesdirectory as it contain thenpmpackages.
- In the command line run below command to add the files. It add all the files in our project except
node_modulesfolder.
git add .- Then commit the files.
git commit -m "React project with basic setup using webpack and babel"- Then map the local repository to the remote(It is one time process).
git remote add origin https://github.com/GO-gyan/my-react-app.git- Then push the code to the repository.
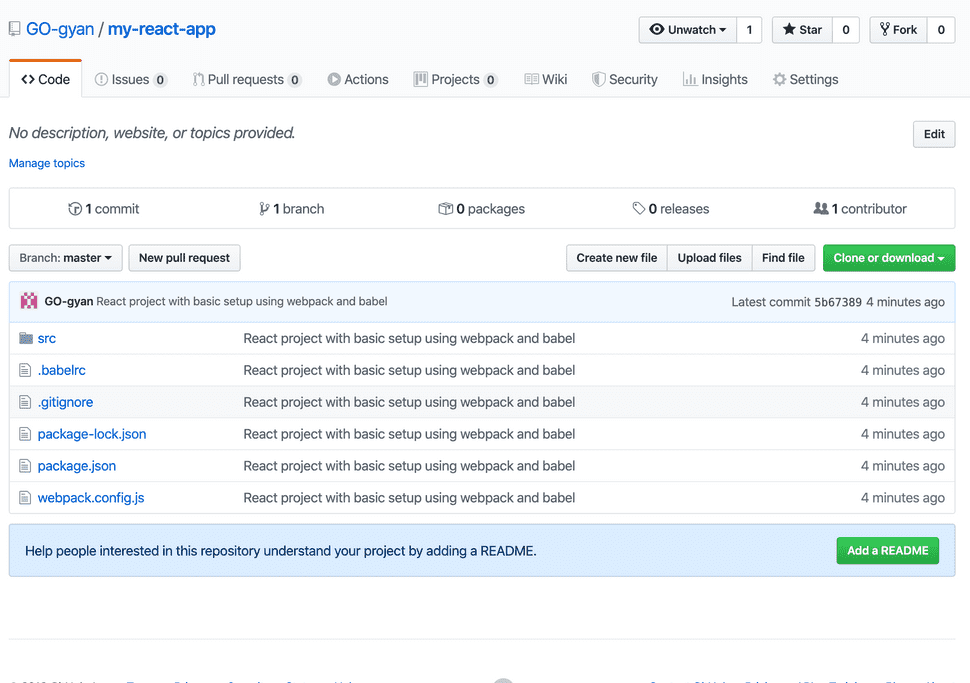
git push -u origin masterAfter pushing the code, you can see the exact folder and file structure in the GitHub.
Here is the GitHub link for the same.
Conclusion:
Now a days the library and frameworks like react, vue and angular help the developers to write the application from scratch very easily in less time. I have provided the basic setup configuration to run a react application. In my upcoming blogs I will discuss about the lint, sass, redux etc integration with this application.
